 Wiki
Play free
Area 50
Swamp of Destruction
Swamp of Destruction is area 50 of 51 in Continent of Legend. It requires level 306 • 3 resets, has 3 monster types and the boss Dark Sapi Queen.
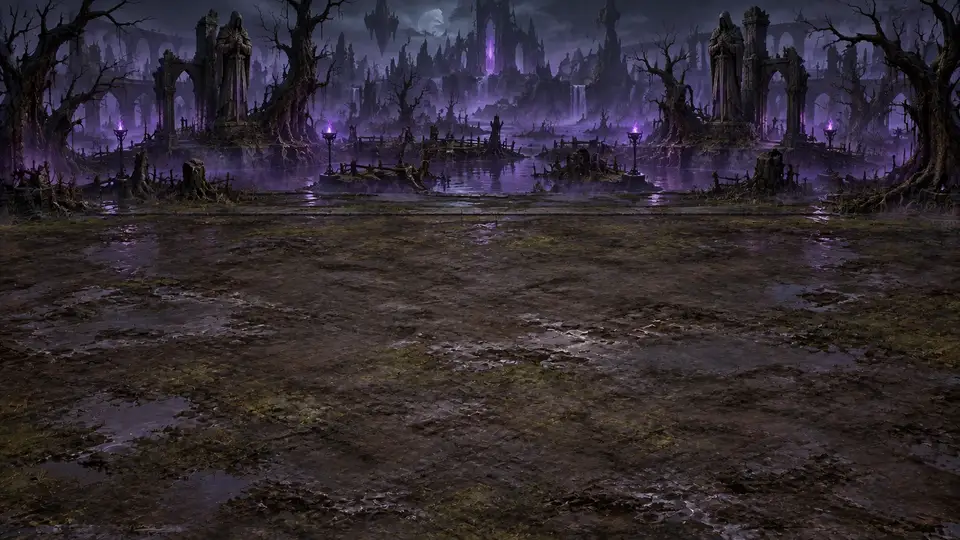
Lore
Swamp of Destruction is a marsh of boiling mud and charred trees, the last frontier of the Continent's wetlands before the lands where dragons make their nests. Nothing there has any living color: the water is lead-grey, the plants are black and the sky hides behind a thick fog. It is the cruelest face of the swamps, worse than the Swamp of Peace and the Swamp of Darkness combined.
The sapis, tiny fairies of the bog, had tended the water and the plants since forgotten times. When destruction came, they suffered most of all, because their lives were bound to the swamp's. Rotten mana turned that bond into hunger. They grew, sprouted dark wings and began serving the shadow masters hiding among the dead trees. Not one of them remembers what it meant to care for anything.
Dark Shadow Master and Dark Napin are quick and attack in packs, leaping out of the fog to strike and vanish again. Behind them, the Dark Sapi Queen rules the bog from a throne of roots, casting spells from a distance. Her Arcane Blast sets the whole swamp bubbling and lights it up for an instant, revealing just how many shadows still lurk within.
Monsters in Swamp of Destruction
The horde of Swamp of Destruction comes in waves: the first ones on the list show up in the early stages and the last ones near the boss. The numbers are the reference values, without Reset; with each Reset the monsters get stronger.
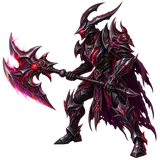
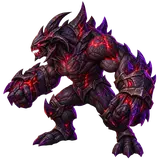
Boss of Swamp of Destruction
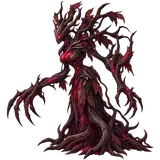
Dark Sapi Queen
Magic • HP 282,913 • Damage 2,018 • Defense 351
Special attack: Arcane Burst, every 4 attacks (161% of damage, ignores 15% of defense).
Loot focus: Accessories / Weapons (Endgame).
Best drops in Swamp of Destruction by class
Monsters drop items up to Legendary; the boss, up to Ancient, and sometimes the next family. Legendary and Ancient items can be for any class.
Warrior
| Piece | Monsters | Boss (sometimes) |
|---|---|---|
| Weapon | Imperial Sword | — |
| Helm | Ancestral Imperial Knight Helm | — |
| Armor | Ancestral Imperial Knight Armor | — |
| Boots | Ancestral Imperial Knight Boots | — |
| Pendant | Battle Lapis Lazuli Necklace | — |
| Ring | Ring of Ultimatum | — |
Mage
| Piece | Monsters | Boss (sometimes) |
|---|---|---|
| Weapon | Imperial Wizard Staff | — |
| Helm | Ancestral Imperial Wizard Helm | — |
| Armor | Ancestral Imperial Wizard Armor | — |
| Boots | Ancestral Imperial Wizard Boots | — |
| Pendant | Battle Lapis Lazuli Necklace | — |
| Ring | Ring of Ultimatum | — |
Archer
| Piece | Monsters | Boss (sometimes) |
|---|---|---|
| Weapon | Imperial Bow | — |
| Helm | Ancestral Imperial Elf Helm | — |
| Armor | Ancestral Imperial Elf Armor | — |
| Boots | Ancestral Imperial Elf Boots | — |
| Pendant | Battle Lapis Lazuli Necklace | — |
| Ring | Ring of Ultimatum | — |
Magic Gladiator
| Piece | Monsters | Boss (sometimes) |
|---|---|---|
| Weapon | Imperial Magic Sword | — |
| Helm | Imperial Magic Helm | — |
| Armor | Imperial Magic Armor | — |
| Boots | Imperial Magic Boots | — |
| Pendant | Battle Lapis Lazuli Necklace | — |
| Ring | Ring of Ultimatum | — |
Dark Lord
| Piece | Monsters | Boss (sometimes) |
|---|---|---|
| Weapon | Imperial Scepter | — |
| Helm | Ancestral Imperial Lord Helm | — |
| Armor | Ancestral Imperial Lord Armor | — |
| Boots | Ancestral Imperial Lord Boots | — |
| Pendant | Battle Lapis Lazuli Necklace | — |
| Ring | Ring of Ultimatum | — |
Summoner
| Piece | Monsters | Boss (sometimes) |
|---|---|---|
| Weapon | Imperial Glaive | — |
| Helm | Ancestral Imperial Summoner Helm | — |
| Armor | Ancestral Imperial Summoner Armor | — |
| Boots | Ancestral Imperial Summoner Boots | — |
| Pendant | Battle Lapis Lazuli Necklace | — |
| Ring | Ring of Ultimatum | — |
Drop chances in Swamp of Destruction
The chance of each drop per defeated enemy, the same as the in-game Codex (tap the monster and see DROPS). These are the Normal mode chances, without events.
| Drop | Horde monster | Boss |
|---|---|---|
| Equipment | 14% | 100% |
| Blacksmith Scroll | 0.5% (1 in 200) | 2% |
| Jewel of Bless (PT) | 0.52% (1 in 193) | 4% |
| Jewel of Soul (PT) | 0.35% (1 in 289) | 2.7% |
| Jewel of Chaos (PT) | 0.0023% (1 in 43,000) | 0.037% (1 in 2,700) |
| Taming Seal (PT) | 0.35% (1 in 289) | 0.15% (1 in 667) |
| Ascension Core | — | 1.5% |
| Loch's Feather (PT) | — | 0.45% (1 in 224) |
Equipment rarity
When a piece of equipment drops, this is the chance of each rarity:
| Rarity | Horde monster | Boss |
|---|---|---|
| Common | 78% | — |
| Uncommon | 19% | 87% |
| Rare | 3.3% | 12% |
| Epic | 0.2% (1 in 503) | 0.3% (1 in 333) |
| Legendary | 0.001% (1 in 100,000) | 0.008% (1 in 12,000) |
| Ancient | — | 0.001% (1 in 100,000) |
On Hard and Hardcore
| Drop | Hard: horde | Hard: boss | Hardcore: horde | Hardcore: boss |
|---|---|---|---|---|
| Equipment | 14% | 100% | 14% | 100% |
| Blacksmith Scroll | 0.5% (1 in 200) | 2% | 0.5% (1 in 200) | 2% |
| Jewel of Bless (PT) | 0.32% (1 in 313) | 2.5% | 0.3% (1 in 337) | 2.3% |
| Jewel of Soul (PT) | 0.21% (1 in 469) | 1.6% | 0.2% (1 in 506) | 1.5% |
| Jewel of Chaos (PT) | 0.0014% (1 in 70,000) | 0.023% (1 in 4,400) | 0.0013% (1 in 76,000) | 0.021% (1 in 4,700) |
| Taming Seal (PT) | 0.21% (1 in 469) | 0.15% (1 in 667) | 0.2% (1 in 506) | 0.15% (1 in 667) |
| Ascension Core | — | 1.5% | — | 1.5% |
| Loch's Feather (PT) | — | 0.45% (1 in 224) | — | 0.45% (1 in 224) |
| Rarity | Hard: horde | Hard: boss | Hardcore: horde | Hardcore: boss |
|---|---|---|---|---|
| Common | 78% | — | 78% | — |
| Uncommon | 19% | 87% | 19% | 87% |
| Rare | 3.3% | 12% | 3.3% | 12% |
| Epic | 0.3% (1 in 335) | 0.45% (1 in 222) | 0.5% (1 in 201) | 0.75% (1 in 133) |
| Legendary | 0.0015% (1 in 67,000) | 0.012% (1 in 8,300) | 0.0025% (1 in 40,000) | 0.02% (1 in 5,000) |
| Ancient | — | 0.0015% (1 in 67,000) | — | 0.0025% (1 in 40,000) |
On Hard items drop as Nightmare (+40% to flat attributes and +30% to % bonuses); on Hardcore they also drop as Nightmare, and once in a while, very rarely, a Godlike (+80%) comes, delivered by letter.
Special enemies pay more: the Elite drops an item 38% of the time, the Champion 70% and the Ancient Monster 100%; Champion and Ancient Monster raise the item's rarity by 1 level. The jewel chance is 2× on the Elite, 4× on the Champion and 8× on the Ancient Monster. Each Reset also raises the jewel chance a little. See Special enemies (PT).
Swamp of Destruction on Hard and Hardcore
| Mode | Requirement | Items that drop |
|---|---|---|
| Normal | Level 306 • 3 Resets | Normal |
| Hard | Level 306 • 234 Resets | Nightmare (+40% to flat attributes and +30% to % bonuses) |
| Hardcore | Level 306 • 736 Resets | Nightmare; Godlike (+80%) very rare, by letter |
On Hard and Hardcore the monsters have their own strength and the boss has more life. Each boss you defeat opens the next map of the mode and grants a Mark (+0.3% against monsters).
Frequently asked questions
How do stages work?
Each map has 10 stages (the little bars on the area card). You advance by defeating the horde.
On stage 10 the map boss shows up by itself. Beat it with ADVANCE on and you move to the next map.
What are the Hard and Hardcore modes?
On the Map (🗺️ WORLD button) there are 3 cards at the top: NORMAL, HARD and HARDCORE. Tap a locked card to see what you still need to open it.
- HARD: opens at 10 resets. The same 51 maps, stronger, and every item that drops is Nightmare: the same item as in Normal with 30% more base stats (×1.3). If you die, you go back one map (from Hard 1, to Normal).
- HARDCORE: opens when you beat the Hard 51 boss (Hardcore 1 asks for 300 resets). Items drop as Nightmare and, very rarely, a Godlike comes: 70% more base stats (×1.7), delivered by letter. If you die, you go back one map.
- Each boss beaten in a mode opens the next map and gives a Mark (+0.3% against monsters).
- At the BLACKSMITH, Migrate tab, an item's whole + moves to the same Nightmare or Godlike item.
What is "After the boss"?
It's in BATTLE ORDERS, on the BATTLE screen, and decides what happens when the boss falls:
- ADVANCE: go to the next area (the default and recommended).
- REPEAT: redo the same area's route, good for farming.
I can't beat the boss. Now what?
- Spend all unused points (SEE DETAILS › ATTRIBUTES).
- Wear your best INVENTORY items and repair broken ones at the BLACKSMITH.
- Upgrade your skills (SEE DETAILS › SKILLS › UPGRADE).
- Refine your equipment at the BLACKSMITH.
- Lock an earlier stage and hunt for a while to level up.