 Wiki
Play free
Area 49
Kardamahal Underground Temple
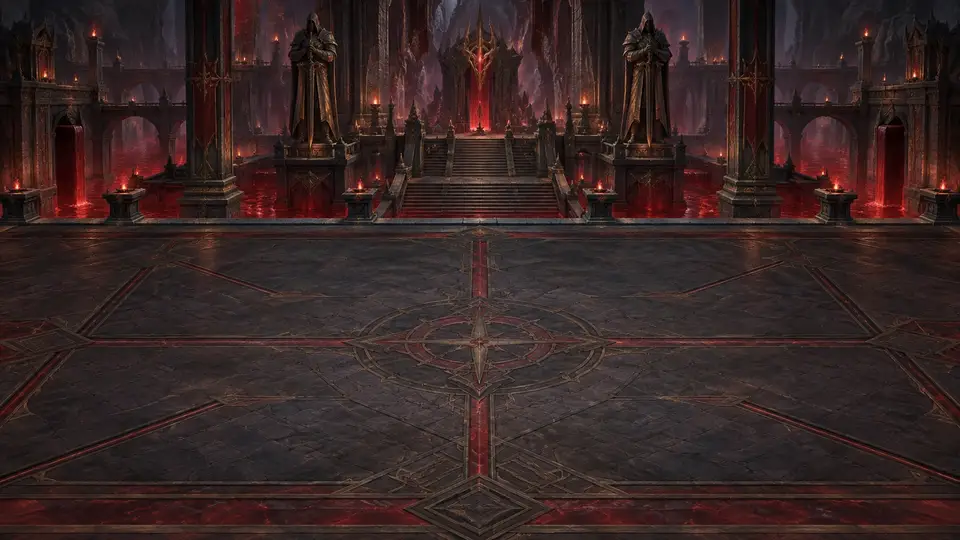
Kardamahal Underground Temple is area 49 of 51 in Continent of Legend. It requires level 265 • 3 resets, has 3 monster types and the boss Devil Sorcery.
Lore
Kardamahal Underground Temple is a temple carved into the rock far below the surface, where a secret cult worshipped Kundun even before the Night of the Broken Seal. Its halls are long and low, covered in inscriptions that burn the eyes, and the altars still hold black candles that light themselves. Few places on the Continent lie so close to the Demon Emperor's power.
The priests of Kardamahal helped weaken the Seal from within, offering the enemy the temple's own sacred weapons. As a reward, Kundun gave those weapons life. Swords, scythes and grimoires gained a will and became the sanctuary's guardians. The priests, for their part, were forgotten by the master they served: all that remains of them are names scratched out on the walls.
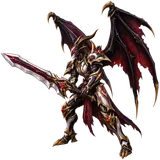
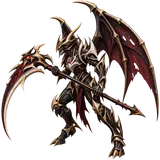
Devil Sword and Devil Scythe float through the corridors and attack up close, slicing without ever tiring. Devil Sorcery is a cursed grimoire that casts spells from afar, turning its own pages. The oldest of these books rests on the main altar and commands the whole temple. When it opens all the way, it unleashes Arcane Blast, flooding the halls with purple light and shadow.
Monsters in Kardamahal Underground Temple
The horde of Kardamahal Underground Temple comes in waves: the first ones on the list show up in the early stages and the last ones near the boss. The numbers are the reference values, without Reset; with each Reset the monsters get stronger.
Boss of Kardamahal Underground Temple
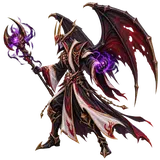
Devil Sorcery
Magic • HP 227,661 • Damage 1,756 • Defense 323
Special attack: Arcane Burst, every 4 attacks (161% of damage, ignores 15% of defense).
Loot focus: Accessories / Weapons (Endgame).
Best drops in Kardamahal Underground Temple by class
Monsters drop items up to Legendary; the boss, up to Ancient, and sometimes the next family. Legendary and Ancient items can be for any class.
Warrior
| Piece | Monsters | Boss (sometimes) |
|---|---|---|
| Weapon | Temple Guard Sword | Imperial Sword |
| Helm | Ancestral Imperial Knight Helm | — |
| Armor | Ancestral Imperial Knight Armor | — |
| Boots | Ancestral Imperial Knight Boots | — |
| Pendant | Battle Lapis Lazuli Necklace | — |
| Ring | Ring of Ultimatum | — |
Mage
| Piece | Monsters | Boss (sometimes) |
|---|---|---|
| Weapon | Imperial Wizard Staff | — |
| Helm | Ancestral Imperial Wizard Helm | — |
| Armor | Ancestral Imperial Wizard Armor | — |
| Boots | Ancestral Imperial Wizard Boots | — |
| Pendant | Battle Lapis Lazuli Necklace | — |
| Ring | Ring of Ultimatum | — |
Archer
| Piece | Monsters | Boss (sometimes) |
|---|---|---|
| Weapon | Temple Guard Bow | Imperial Bow |
| Helm | Ancestral Imperial Elf Helm | — |
| Armor | Ancestral Imperial Elf Armor | — |
| Boots | Ancestral Imperial Elf Boots | — |
| Pendant | Battle Lapis Lazuli Necklace | — |
| Ring | Ring of Ultimatum | — |
Magic Gladiator
| Piece | Monsters | Boss (sometimes) |
|---|---|---|
| Weapon | Imperial Magic Sword | — |
| Helm | Imperial Magic Helm | — |
| Armor | Imperial Magic Armor | — |
| Boots | Imperial Magic Boots | — |
| Pendant | Battle Lapis Lazuli Necklace | — |
| Ring | Ring of Ultimatum | — |
Dark Lord
| Piece | Monsters | Boss (sometimes) |
|---|---|---|
| Weapon | Imperial Scepter | — |
| Helm | Ancestral Imperial Lord Helm | — |
| Armor | Ancestral Imperial Lord Armor | — |
| Boots | Ancestral Imperial Lord Boots | — |
| Pendant | Battle Lapis Lazuli Necklace | — |
| Ring | Ring of Ultimatum | — |
Summoner
| Piece | Monsters | Boss (sometimes) |
|---|---|---|
| Weapon | Imperial Glaive | — |
| Helm | Ancestral Imperial Summoner Helm | — |
| Armor | Ancestral Imperial Summoner Armor | — |
| Boots | Ancestral Imperial Summoner Boots | — |
| Pendant | Battle Lapis Lazuli Necklace | — |
| Ring | Ring of Ultimatum | — |
Drop chances in Kardamahal Underground Temple
The chance of each drop per defeated enemy, the same as the in-game Codex (tap the monster and see DROPS). These are the Normal mode chances, without events.
| Drop | Horde monster | Boss |
|---|---|---|
| Equipment | 14% | 100% |
| Blacksmith Scroll | 0.5% (1 in 200) | 2% |
| Jewel of Bless (PT) | 0.51% (1 in 197) | 3.9% |
| Jewel of Soul (PT) | 0.34% (1 in 295) | 2.6% |
| Jewel of Chaos (PT) | 0.0023% (1 in 44,000) | 0.036% (1 in 2,800) |
| Taming Seal (PT) | 0.34% (1 in 295) | 0.15% (1 in 667) |
| Ascension Core | — | 1.5% |
| Loch's Feather (PT) | — | 0.4% (1 in 251) |
Equipment rarity
When a piece of equipment drops, this is the chance of each rarity:
| Rarity | Horde monster | Boss |
|---|---|---|
| Common | 78% | — |
| Uncommon | 19% | 87% |
| Rare | 3.3% | 12% |
| Epic | 0.2% (1 in 503) | 0.3% (1 in 333) |
| Legendary | 0.001% (1 in 100,000) | 0.008% (1 in 12,000) |
| Ancient | — | 0.001% (1 in 100,000) |
On Hard and Hardcore
| Drop | Hard: horde | Hard: boss | Hardcore: horde | Hardcore: boss |
|---|---|---|---|---|
| Equipment | 14% | 100% | 14% | 100% |
| Blacksmith Scroll | 0.5% (1 in 200) | 2% | 0.5% (1 in 200) | 2% |
| Jewel of Bless (PT) | 0.32% (1 in 313) | 2.5% | 0.3% (1 in 337) | 2.3% |
| Jewel of Soul (PT) | 0.21% (1 in 469) | 1.6% | 0.2% (1 in 506) | 1.5% |
| Jewel of Chaos (PT) | 0.0014% (1 in 70,000) | 0.023% (1 in 4,400) | 0.0013% (1 in 76,000) | 0.021% (1 in 4,700) |
| Taming Seal (PT) | 0.21% (1 in 469) | 0.15% (1 in 667) | 0.2% (1 in 506) | 0.15% (1 in 667) |
| Ascension Core | — | 1.5% | — | 1.5% |
| Loch's Feather (PT) | — | 0.4% (1 in 251) | — | 0.4% (1 in 251) |
| Rarity | Hard: horde | Hard: boss | Hardcore: horde | Hardcore: boss |
|---|---|---|---|---|
| Common | 78% | — | 78% | — |
| Uncommon | 19% | 87% | 19% | 87% |
| Rare | 3.3% | 12% | 3.3% | 12% |
| Epic | 0.3% (1 in 335) | 0.45% (1 in 222) | 0.5% (1 in 201) | 0.75% (1 in 133) |
| Legendary | 0.0015% (1 in 67,000) | 0.012% (1 in 8,300) | 0.0025% (1 in 40,000) | 0.02% (1 in 5,000) |
| Ancient | — | 0.0015% (1 in 67,000) | — | 0.0025% (1 in 40,000) |
On Hard items drop as Nightmare (+40% to flat attributes and +30% to % bonuses); on Hardcore they also drop as Nightmare, and once in a while, very rarely, a Godlike (+80%) comes, delivered by letter.
Special enemies pay more: the Elite drops an item 38% of the time, the Champion 70% and the Ancient Monster 100%; Champion and Ancient Monster raise the item's rarity by 1 level. The jewel chance is 2× on the Elite, 4× on the Champion and 8× on the Ancient Monster. Each Reset also raises the jewel chance a little. See Special enemies (PT).
Kardamahal Underground Temple on Hard and Hardcore
| Mode | Requirement | Items that drop |
|---|---|---|
| Normal | Level 265 • 3 Resets | Normal |
| Hard | Level 265 • 220 Resets | Nightmare (+40% to flat attributes and +30% to % bonuses) |
| Hardcore | Level 265 • 723 Resets | Nightmare; Godlike (+80%) very rare, by letter |
On Hard and Hardcore the monsters have their own strength and the boss has more life. Each boss you defeat opens the next map of the mode and grants a Mark (+0.3% against monsters).
Frequently asked questions
How do stages work?
Each map has 10 stages (the little bars on the area card). You advance by defeating the horde.
On stage 10 the map boss shows up by itself. Beat it with ADVANCE on and you move to the next map.
What are the Hard and Hardcore modes?
On the Map (🗺️ WORLD button) there are 3 cards at the top: NORMAL, HARD and HARDCORE. Tap a locked card to see what you still need to open it.
- HARD: opens at 10 resets. The same 51 maps, stronger, and every item that drops is Nightmare: the same item as in Normal with 30% more base stats (×1.3). If you die, you go back one map (from Hard 1, to Normal).
- HARDCORE: opens when you beat the Hard 51 boss (Hardcore 1 asks for 300 resets). Items drop as Nightmare and, very rarely, a Godlike comes: 70% more base stats (×1.7), delivered by letter. If you die, you go back one map.
- Each boss beaten in a mode opens the next map and gives a Mark (+0.3% against monsters).
- At the BLACKSMITH, Migrate tab, an item's whole + moves to the same Nightmare or Godlike item.
What is "After the boss"?
It's in BATTLE ORDERS, on the BATTLE screen, and decides what happens when the boss falls:
- ADVANCE: go to the next area (the default and recommended).
- REPEAT: redo the same area's route, good for farming.
I can't beat the boss. Now what?
- Spend all unused points (SEE DETAILS › ATTRIBUTES).
- Wear your best INVENTORY items and repair broken ones at the BLACKSMITH.
- Upgrade your skills (SEE DETAILS › SKILLS › UPGRADE).
- Refine your equipment at the BLACKSMITH.
- Lock an earlier stage and hunt for a while to level up.