 Wiki
Play free
Area 48
Distorted Karutan
Distorted Karutan is area 48 of 51 in Continent of Legend. It requires level 230 • 3 resets, has 3 monster types and the boss Twisted Condra.
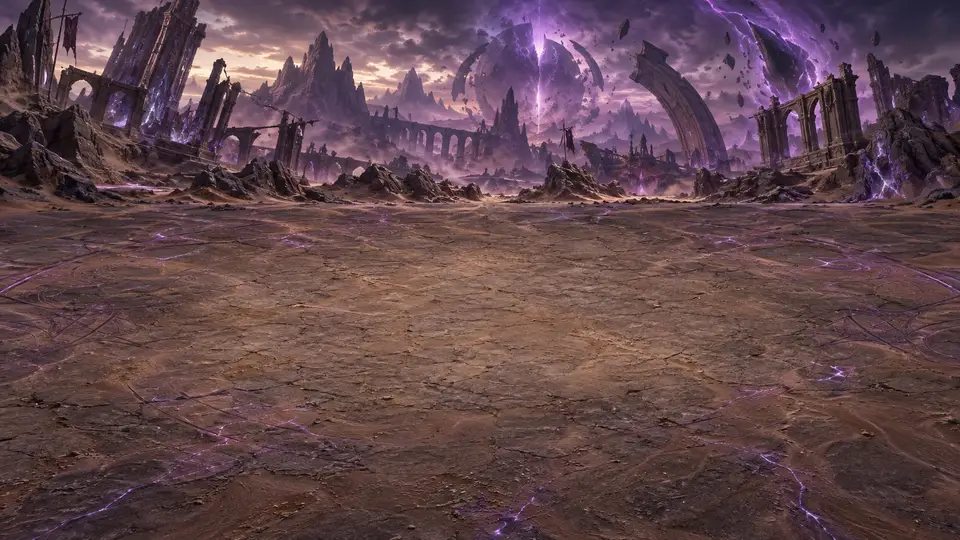
Lore
Distorted Karutan is the desert of Karutan seen through a broken mirror: the same dunes and canyons, only folded in impossible ways. Stones float a hand's breadth above the ground, the horizon bends upward and in places the sand falls toward the sky. Only the most seasoned heroes, reborn many times over, can walk there without losing their way or their nerve.
The distortion began after Narcondra fell. Corrupted as he was, he had been the axis that kept Karutan's rifts under some measure of control; without him, the rotten mana pooled in the desert spread aimlessly and warped space itself. The creatures living there were warped along with it, and today they look like twisted reflections of what they once were.
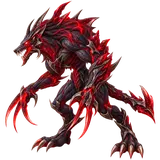
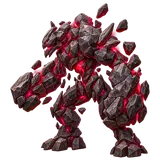
Twisted Crypta, Twisted Gollock and Twisted Condra fight up close, their crooked bodies moving at angles that are hard to predict. They seem to be in two places at once, and every blow lands from the side you least expect. The largest Twisted Condra, a misshapen shadow of Karutan's old lord, guards the heart of the distortion, and its Brutal Strike seems to come from every direction.
Monsters in Distorted Karutan
The horde of Distorted Karutan comes in waves: the first ones on the list show up in the early stages and the last ones near the boss. The numbers are the reference values, without Reset; with each Reset the monsters get stronger.
Boss of Distorted Karutan
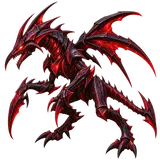
Twisted Condra
Melee • HP 221,485 • Damage 1,418 • Defense 341
Special attack: Brutal Strike, every 4 attacks (161% of damage).
Loot focus: Balanced (Endgame).
Best drops in Distorted Karutan by class
Monsters drop items up to Legendary; the boss, up to Ancient, and sometimes the next family. Legendary and Ancient items can be for any class.
Warrior
| Piece | Monsters | Boss (sometimes) |
|---|---|---|
| Weapon | Temple Guard Sword | Imperial Sword |
| Helm | Temple Guard Knight Helm | Ancestral Imperial Knight Helm |
| Armor | Temple Guard Knight Armor | Ancestral Imperial Knight Armor |
| Boots | Temple Guard Knight Boots | Ancestral Imperial Knight Boots |
| Pendant | Battle Lapis Lazuli Necklace | — |
| Ring | Ring of Ultimatum | — |
Mage
Archer
| Piece | Monsters | Boss (sometimes) |
|---|---|---|
| Weapon | Temple Guard Bow | Imperial Bow |
| Helm | Temple Guard Elf Helm | Ancestral Imperial Elf Helm |
| Armor | Temple Guard Elf Armor | Ancestral Imperial Elf Armor |
| Boots | Temple Guard Elf Boots | Ancestral Imperial Elf Boots |
| Pendant | Battle Lapis Lazuli Necklace | — |
| Ring | Ring of Ultimatum | — |
Magic Gladiator
| Piece | Monsters | Boss (sometimes) |
|---|---|---|
| Weapon | Imperial Magic Sword | — |
| Helm | Temple Guard Magic Helm | Imperial Magic Helm |
| Armor | Temple Guard Magic Armor | Imperial Magic Armor |
| Boots | Temple Guard Magic Boots | Imperial Magic Boots |
| Pendant | Battle Lapis Lazuli Necklace | — |
| Ring | Ring of Ultimatum | — |
Dark Lord
Summoner
| Piece | Monsters | Boss (sometimes) |
|---|---|---|
| Weapon | Temple Guard Glaive | Imperial Glaive |
| Helm | Ancestral Imperial Summoner Helm | — |
| Armor | Ancestral Imperial Summoner Armor | — |
| Boots | Ancestral Imperial Summoner Boots | — |
| Pendant | Battle Lapis Lazuli Necklace | — |
| Ring | Ring of Ultimatum | — |
Drop chances in Distorted Karutan
The chance of each drop per defeated enemy, the same as the in-game Codex (tap the monster and see DROPS). These are the Normal mode chances, without events.
| Drop | Horde monster | Boss |
|---|---|---|
| Equipment | 14% | 100% |
| Blacksmith Scroll | 0.5% (1 in 200) | 2% |
| Jewel of Bless (PT) | 0.5% (1 in 201) | 3.8% |
| Jewel of Soul (PT) | 0.33% (1 in 301) | 2.5% |
| Jewel of Chaos (PT) | 0.0022% (1 in 45,000) | 0.035% (1 in 2,800) |
| Taming Seal (PT) | 0.33% (1 in 301) | 0.15% (1 in 667) |
| Ascension Core | — | 1.5% |
| Loch's Feather (PT) | — | 0.36% (1 in 281) |
Equipment rarity
When a piece of equipment drops, this is the chance of each rarity:
| Rarity | Horde monster | Boss |
|---|---|---|
| Common | 78% | — |
| Uncommon | 19% | 87% |
| Rare | 3.3% | 12% |
| Epic | 0.2% (1 in 503) | 0.3% (1 in 333) |
| Legendary | 0.001% (1 in 100,000) | 0.008% (1 in 12,000) |
| Ancient | — | 0.001% (1 in 100,000) |
On Hard and Hardcore
| Drop | Hard: horde | Hard: boss | Hardcore: horde | Hardcore: boss |
|---|---|---|---|---|
| Equipment | 14% | 100% | 14% | 100% |
| Blacksmith Scroll | 0.5% (1 in 200) | 2% | 0.5% (1 in 200) | 2% |
| Jewel of Bless (PT) | 0.32% (1 in 313) | 2.5% | 0.3% (1 in 337) | 2.3% |
| Jewel of Soul (PT) | 0.21% (1 in 469) | 1.6% | 0.2% (1 in 506) | 1.5% |
| Jewel of Chaos (PT) | 0.0014% (1 in 70,000) | 0.023% (1 in 4,400) | 0.0013% (1 in 76,000) | 0.021% (1 in 4,700) |
| Taming Seal (PT) | 0.21% (1 in 469) | 0.15% (1 in 667) | 0.2% (1 in 506) | 0.15% (1 in 667) |
| Ascension Core | — | 1.5% | — | 1.5% |
| Loch's Feather (PT) | — | 0.36% (1 in 281) | — | 0.36% (1 in 281) |
| Rarity | Hard: horde | Hard: boss | Hardcore: horde | Hardcore: boss |
|---|---|---|---|---|
| Common | 78% | — | 78% | — |
| Uncommon | 19% | 87% | 19% | 87% |
| Rare | 3.3% | 12% | 3.3% | 12% |
| Epic | 0.3% (1 in 335) | 0.45% (1 in 222) | 0.5% (1 in 201) | 0.75% (1 in 133) |
| Legendary | 0.0015% (1 in 67,000) | 0.012% (1 in 8,300) | 0.0025% (1 in 40,000) | 0.02% (1 in 5,000) |
| Ancient | — | 0.0015% (1 in 67,000) | — | 0.0025% (1 in 40,000) |
On Hard items drop as Nightmare (+40% to flat attributes and +30% to % bonuses); on Hardcore they also drop as Nightmare, and once in a while, very rarely, a Godlike (+80%) comes, delivered by letter.
Special enemies pay more: the Elite drops an item 38% of the time, the Champion 70% and the Ancient Monster 100%; Champion and Ancient Monster raise the item's rarity by 1 level. The jewel chance is 2× on the Elite, 4× on the Champion and 8× on the Ancient Monster. Each Reset also raises the jewel chance a little. See Special enemies (PT).
Distorted Karutan on Hard and Hardcore
| Mode | Requirement | Items that drop |
|---|---|---|
| Normal | Level 230 • 3 Resets | Normal |
| Hard | Level 230 • 206 Resets | Nightmare (+40% to flat attributes and +30% to % bonuses) |
| Hardcore | Level 230 • 710 Resets | Nightmare; Godlike (+80%) very rare, by letter |
On Hard and Hardcore the monsters have their own strength and the boss has more life. Each boss you defeat opens the next map of the mode and grants a Mark (+0.3% against monsters).
Frequently asked questions
How do stages work?
Each map has 10 stages (the little bars on the area card). You advance by defeating the horde.
On stage 10 the map boss shows up by itself. Beat it with ADVANCE on and you move to the next map.
What are the Hard and Hardcore modes?
On the Map (🗺️ WORLD button) there are 3 cards at the top: NORMAL, HARD and HARDCORE. Tap a locked card to see what you still need to open it.
- HARD: opens at 10 resets. The same 51 maps, stronger, and every item that drops is Nightmare: the same item as in Normal with 30% more base stats (×1.3). If you die, you go back one map (from Hard 1, to Normal).
- HARDCORE: opens when you beat the Hard 51 boss (Hardcore 1 asks for 300 resets). Items drop as Nightmare and, very rarely, a Godlike comes: 70% more base stats (×1.7), delivered by letter. If you die, you go back one map.
- Each boss beaten in a mode opens the next map and gives a Mark (+0.3% against monsters).
- At the BLACKSMITH, Migrate tab, an item's whole + moves to the same Nightmare or Godlike item.
What is "After the boss"?
It's in BATTLE ORDERS, on the BATTLE screen, and decides what happens when the boss falls:
- ADVANCE: go to the next area (the default and recommended).
- REPEAT: redo the same area's route, good for farming.
I can't beat the boss. Now what?
- Spend all unused points (SEE DETAILS › ATTRIBUTES).
- Wear your best INVENTORY items and repair broken ones at the BLACKSMITH.
- Upgrade your skills (SEE DETAILS › SKILLS › UPGRADE).
- Refine your equipment at the BLACKSMITH.
- Lock an earlier stage and hunt for a while to level up.